
How to Create and Deploy a Joule Skill in SAP Build: Complete Step-by-Step Guide
Introduction
Artificial Intelligence is becoming a key part of enterprise applications, and SAP Joule is designed to make business interactions faster and more intelligent. With Joule Studio in SAP Build, developers can create custom AI-powered skills that automate repetitive business tasks, integrate with SAP and third-party systems, and provide users with conversational experiences.
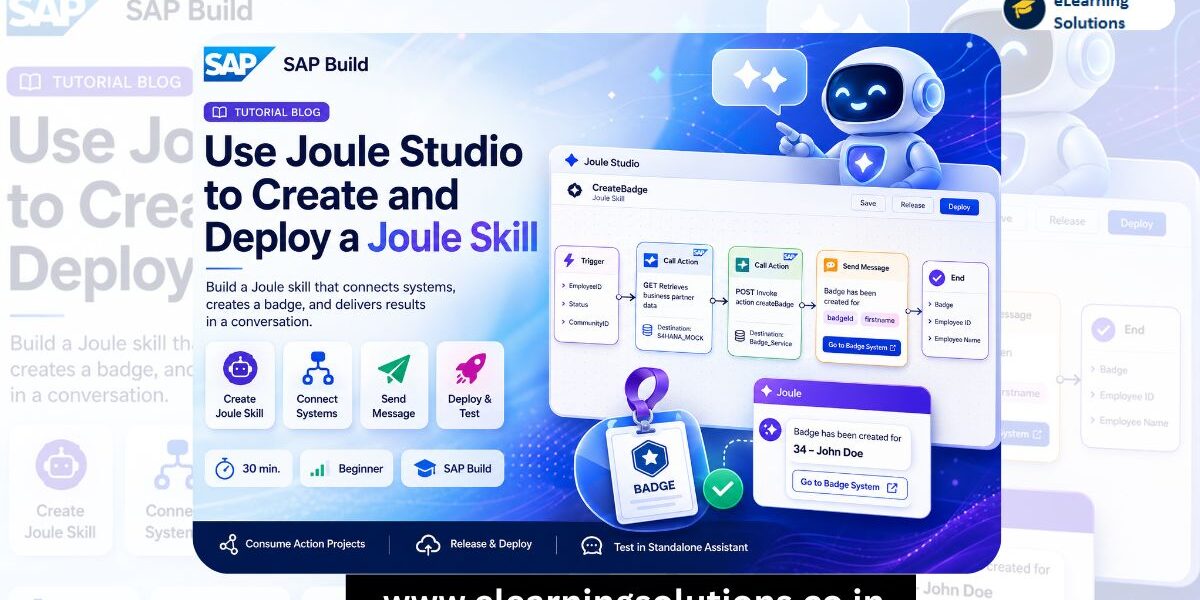
In this tutorial, you’ll learn how to create a custom Joule Skill that retrieves employee information from an SAP S/4HANA system and generates an employee badge through another service. By the end of this guide, you’ll know how to configure skill inputs and outputs, connect action projects, deploy the skill, and test it in the standalone Joule Assistant.
What is a Joule Skill?
A Joule Skill is a reusable AI capability that extends SAP Joule with custom business functionality. Instead of manually navigating multiple SAP applications, users can simply ask Joule to perform a task, and the skill executes the required business actions automatically.
For example, an HR administrator could ask Joule:
“Create a badge for employee 1003764.”
Behind the scenes, the Joule Skill retrieves employee details, calls another service to generate the badge, and returns the confirmation to the user.
Prerequisites
Before starting this tutorial, ensure that you have:
- Access to an SAP BTP tenant with Joule Studio enabled.
- SAP Build access.
- Configured destinations for your OData services.
- Published Action Projects that will be used inside the skill.
- Required permissions to deploy projects.
Having these prerequisites ready will help you complete the tutorial without deployment or connectivity issue
Step 1.
Create a Joule Skill
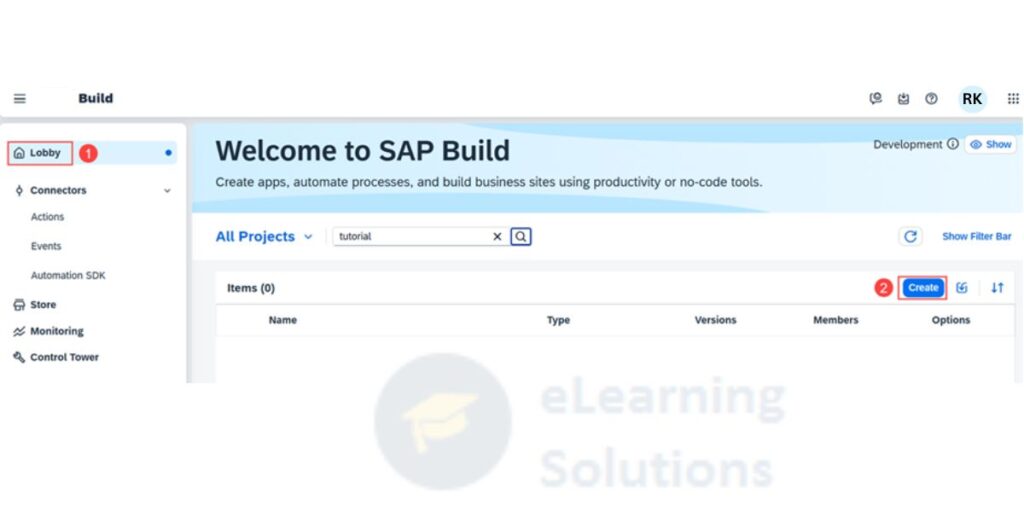
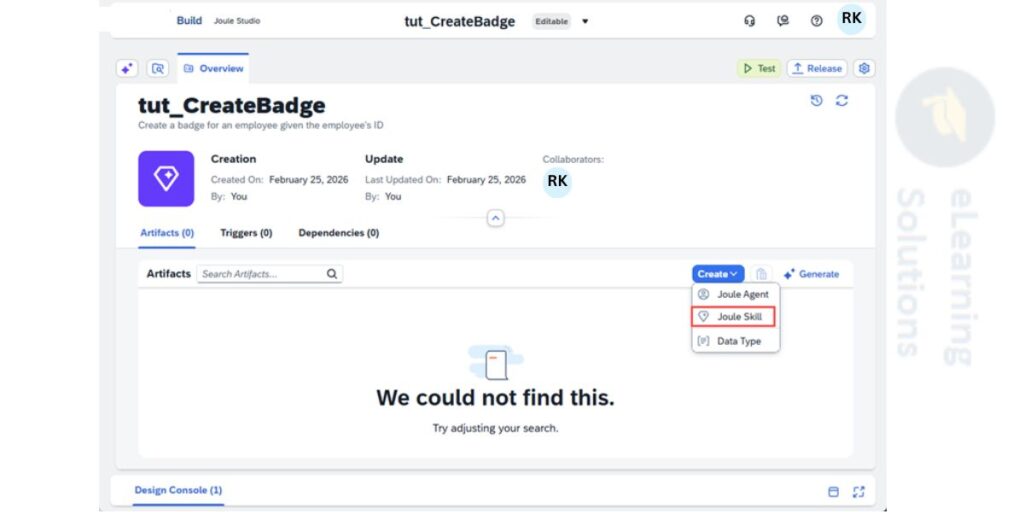
1. Open the SAP Build Lobby.
(This is where you create and manage projects.)
2. Choose Create.
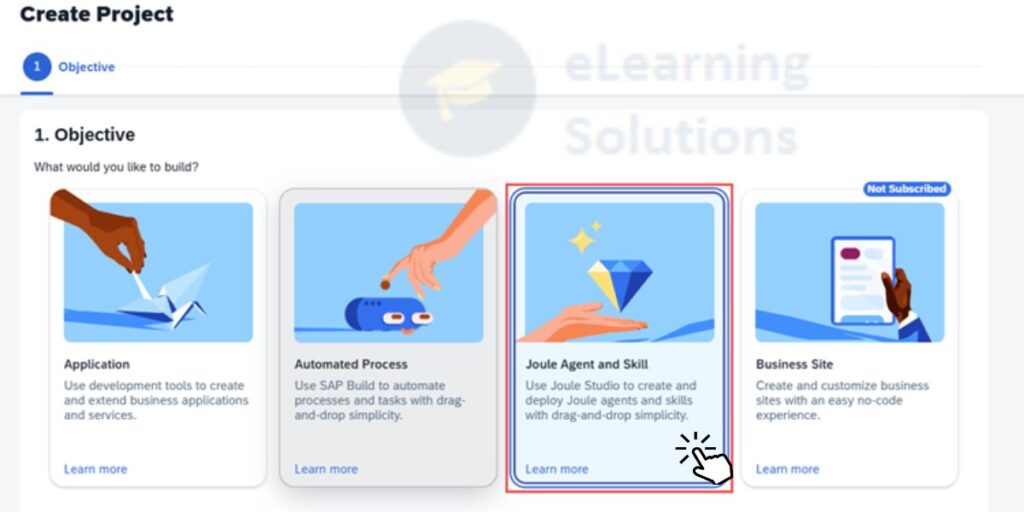
3. Select Joule Skill, then click Next.
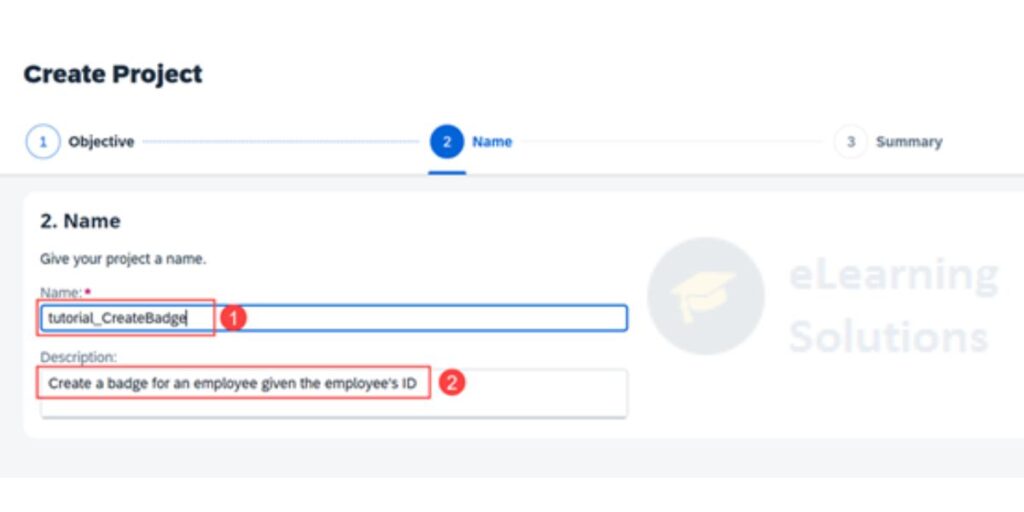
4. Enter the following details :
( Enter name CreateBadge and description Create a badge for an employee given the employee's ID, then choose Review)
.
5. On the following screen choose Create.
6. Choose Create > Joule Skill.
7. Enter name CreateBadge and description Create a badge for an employee given the employee's ID, then choose Create.
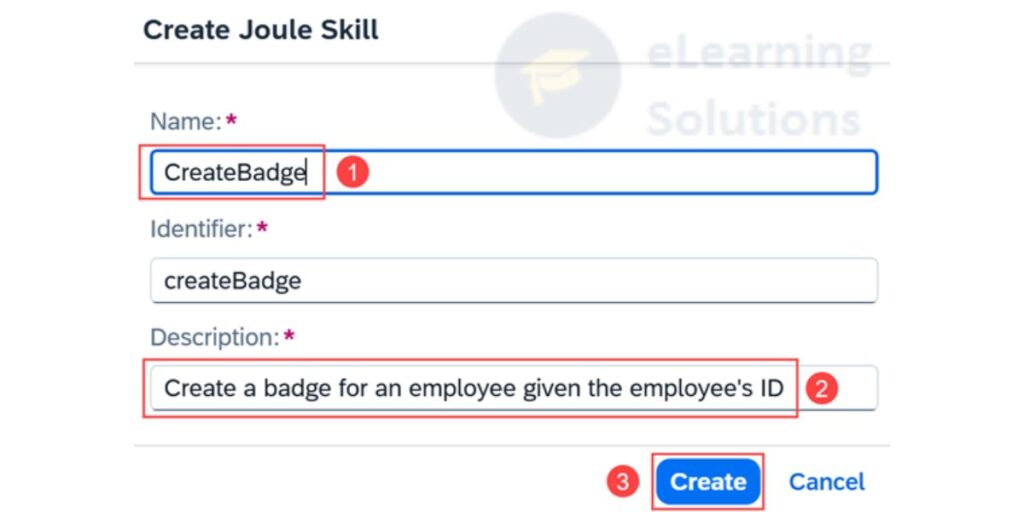
( The description is important because Joule will use it to identify the correct skill to select during a conversation.)
Step 2
Define the Input and Output Parameters
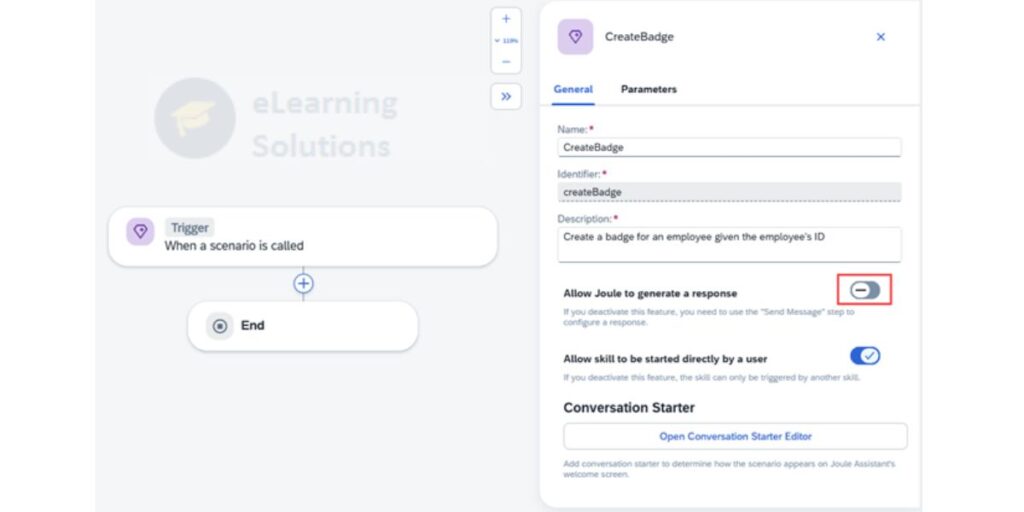
1. Choose Trigger (or <<) to open the side panel.
2.Disable Allow Joule to generate a response.
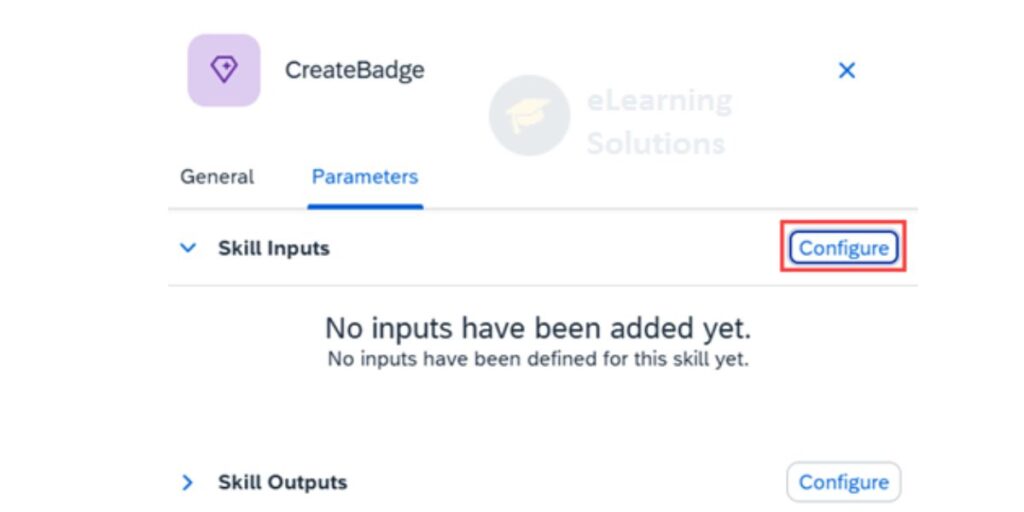
3.Choose Parameters, then choose Configure beside Skill Inputs.
4. Choose Add Input three times and enter:
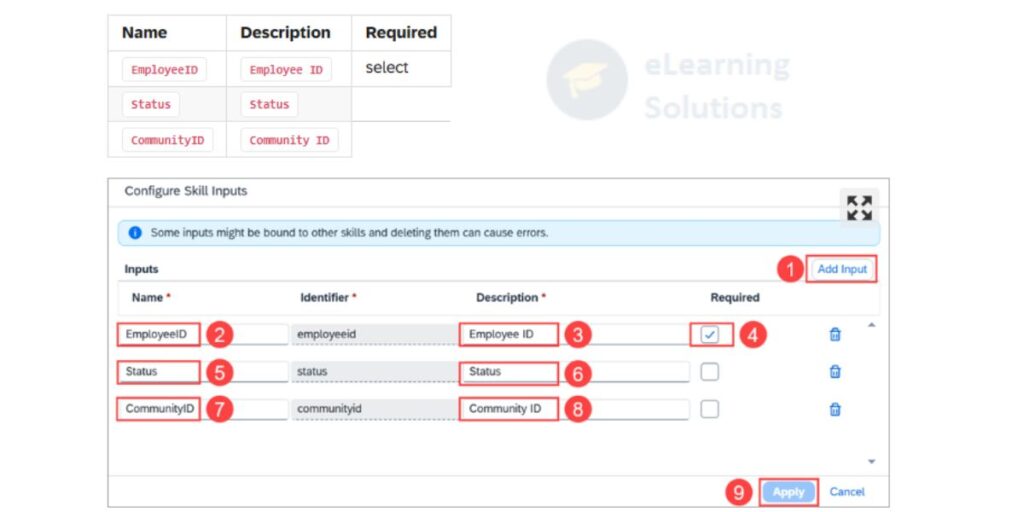
5. Choose Apply.
6. Choose Configure beside Skill Outputs.
7. Choose Add Output three times and then enter:
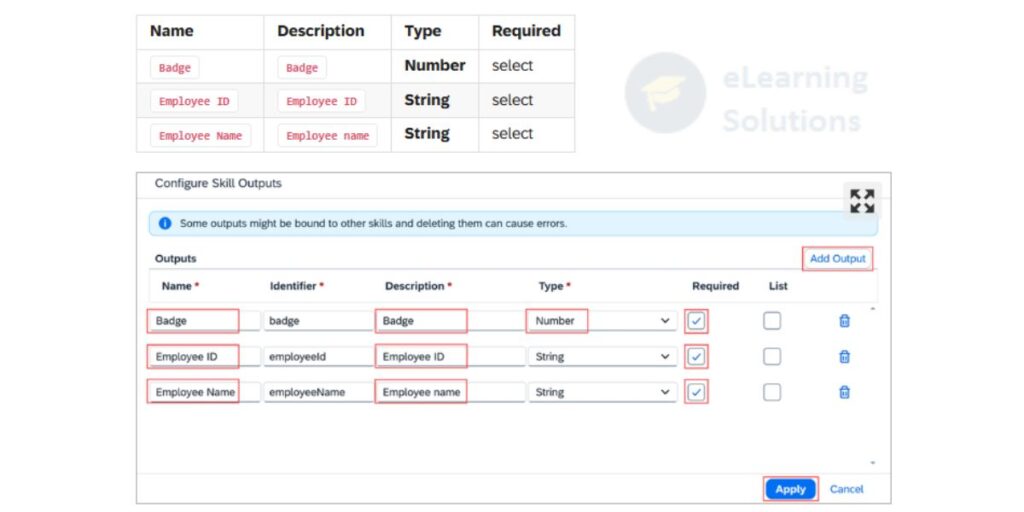
8. Choose Apply
9. Expand Skill Outputs.
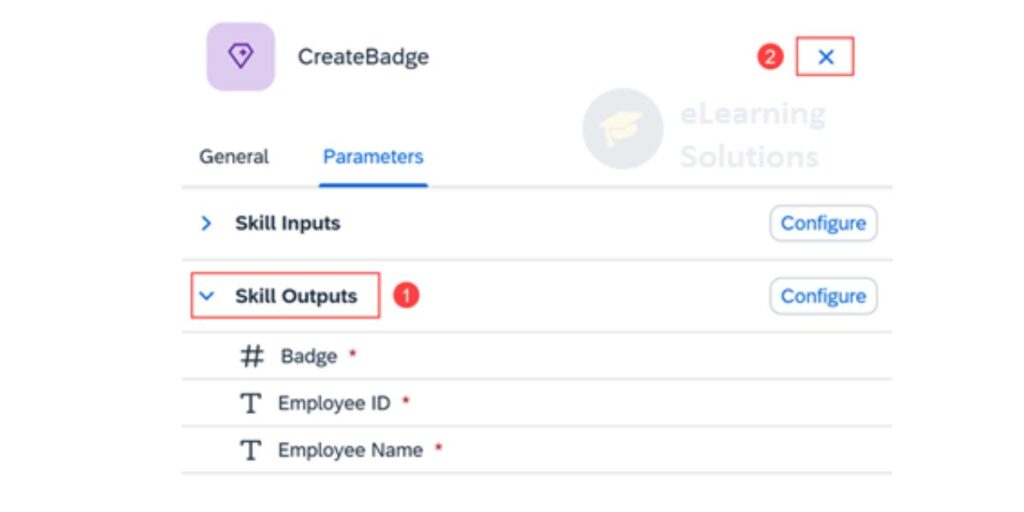
10. Close the side panel.
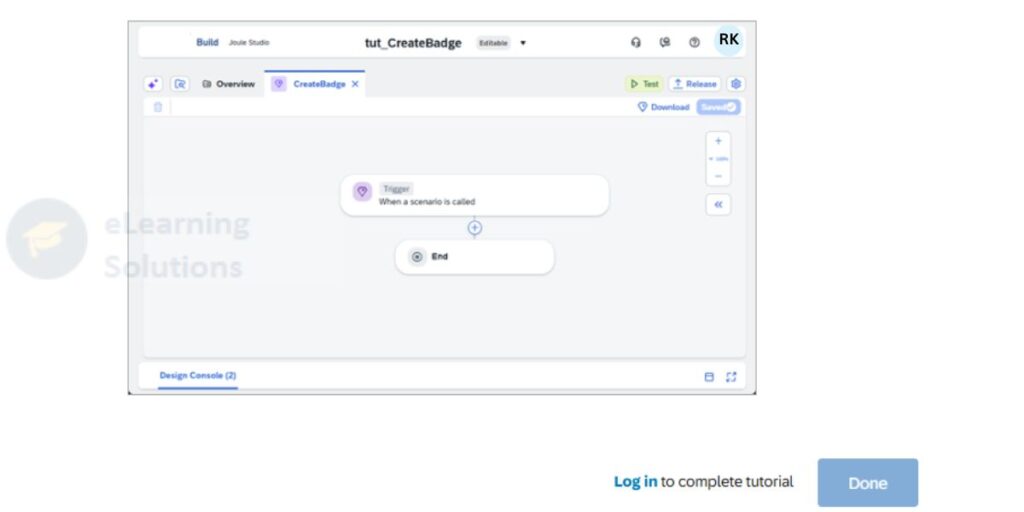
11. Choose Save.
12. Choose Design Console. You should see errors.
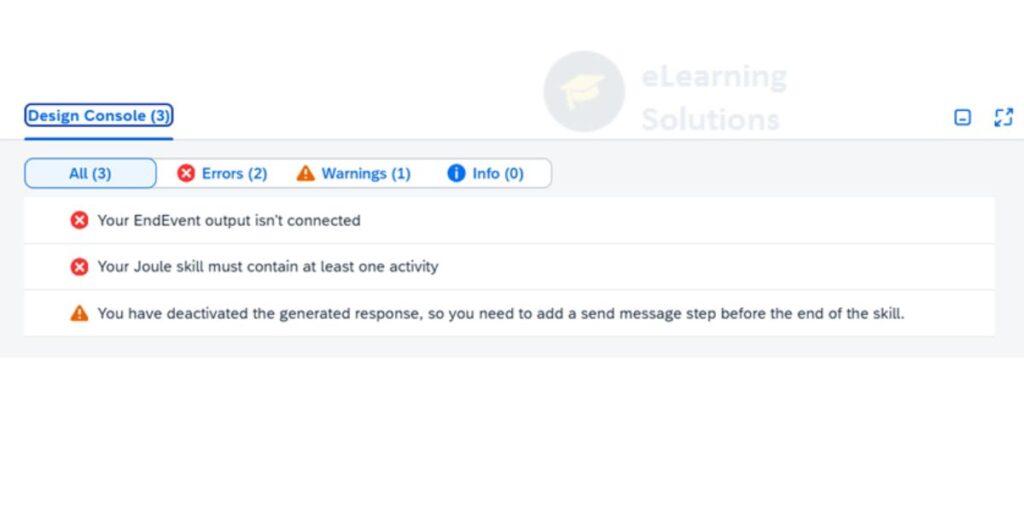
13. Close the Design Console.
Step 3
Add First Action
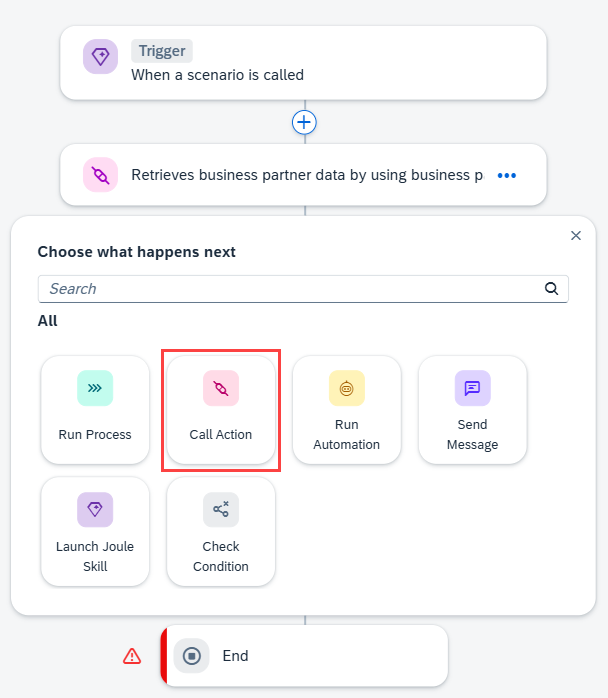
1. Choose the + between Trigger and End.
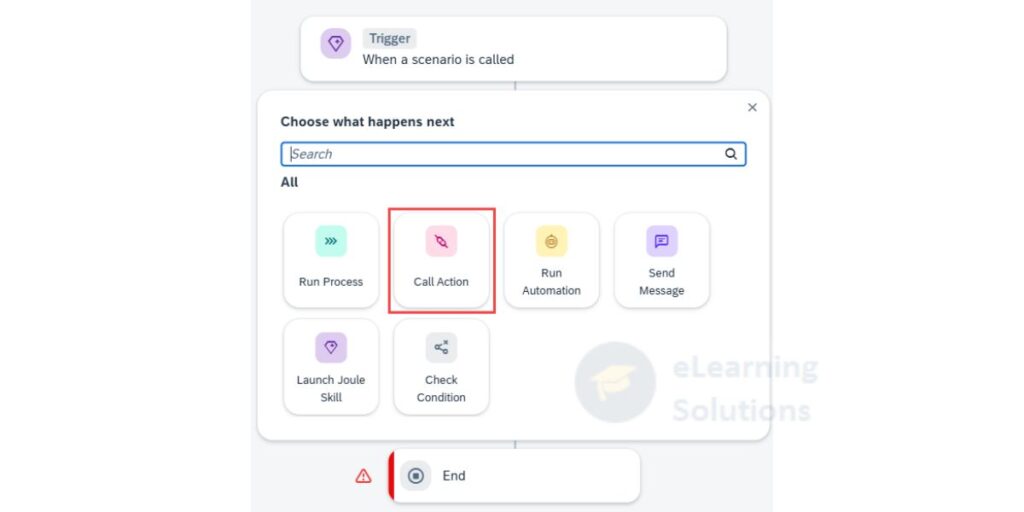
2. Choose Call Action.
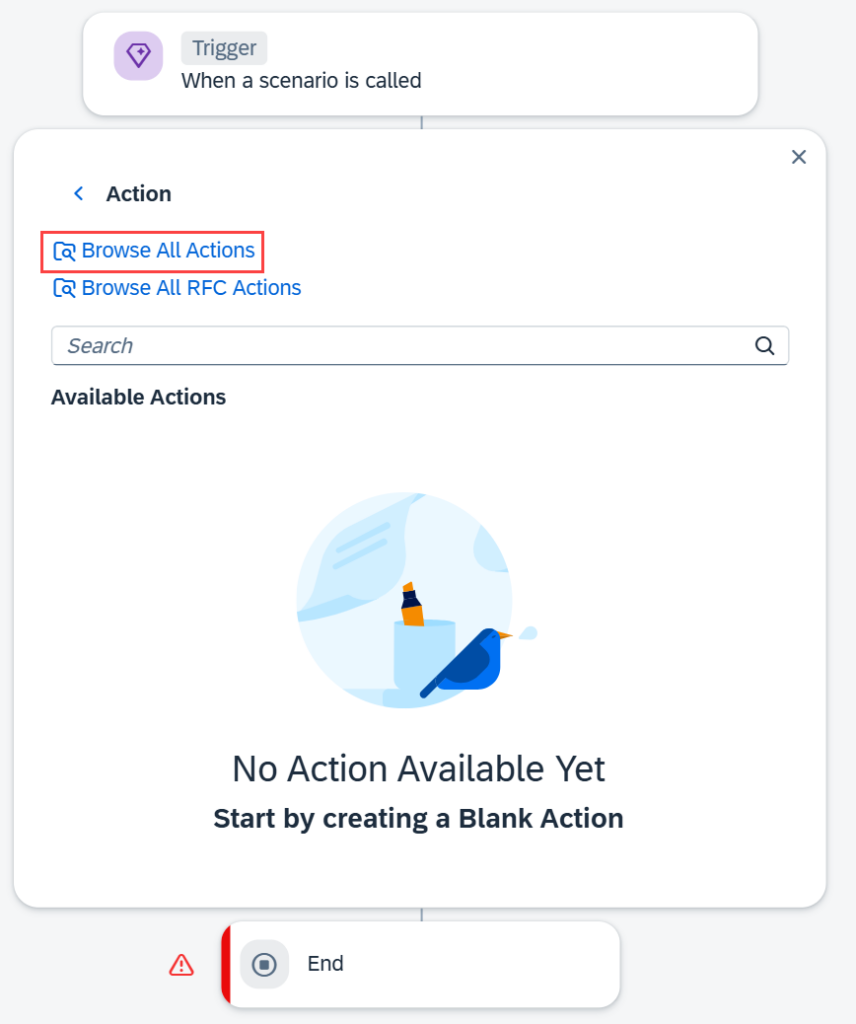
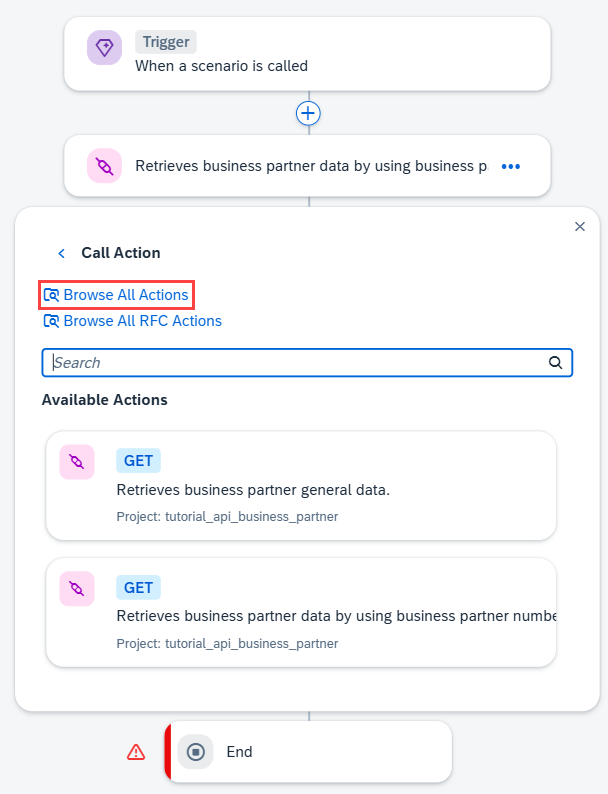
3. Choose Browse All Actions.
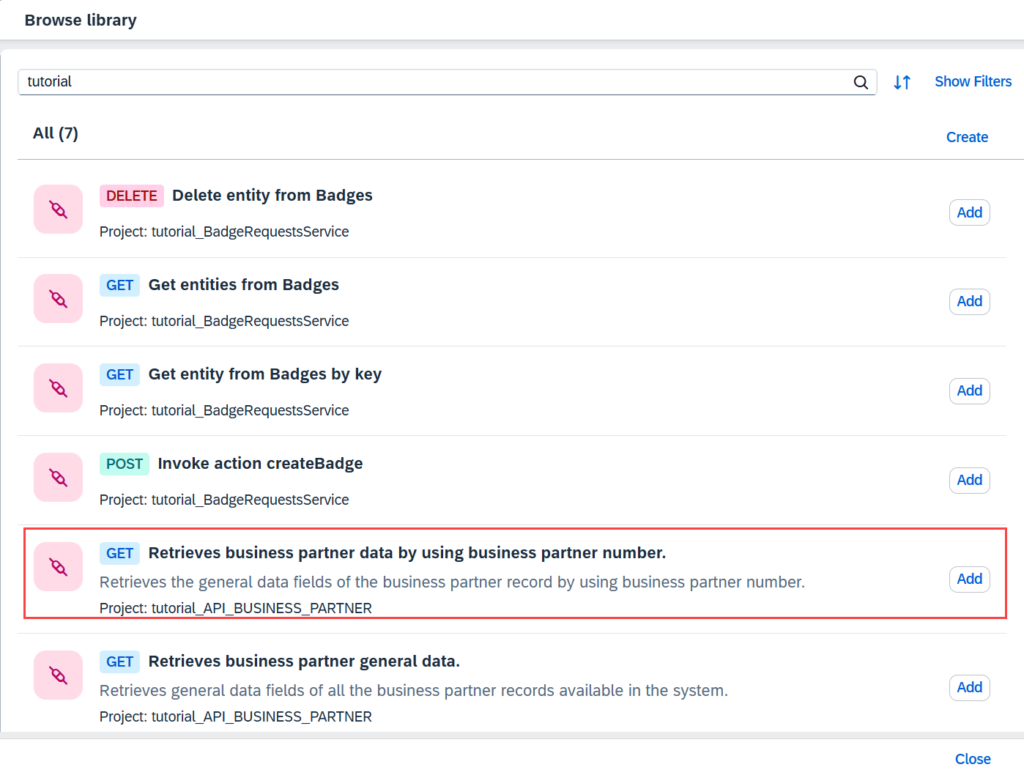
4. Select the action GET Retrieves business partner data by using business partner number and then choose Add.
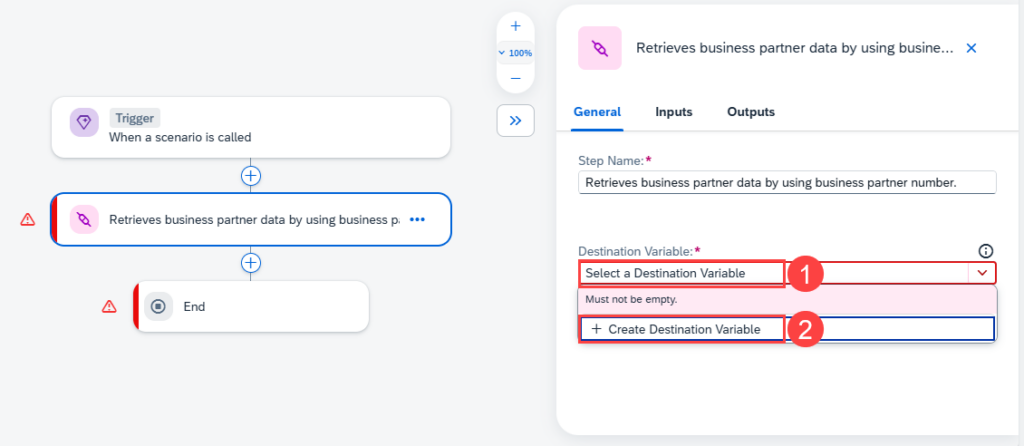
5. Choose Select a Destination, then choose + Create a Destination Variable.

6. Enter S4HANA_MOCK and a description, then choose Create.
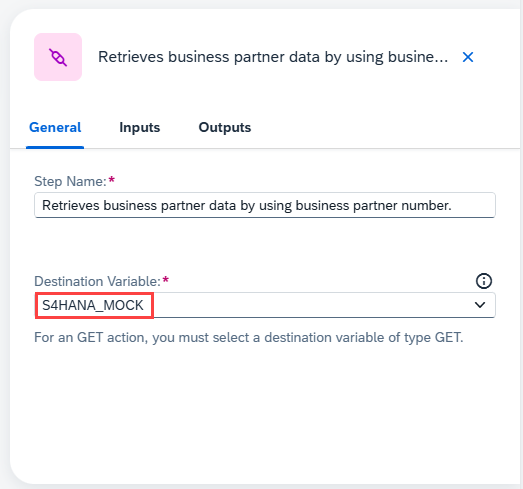
7. Select the destination variable.
8. Choose Inputs, then choose the BusinessPartner field to open the Skill Content pane.
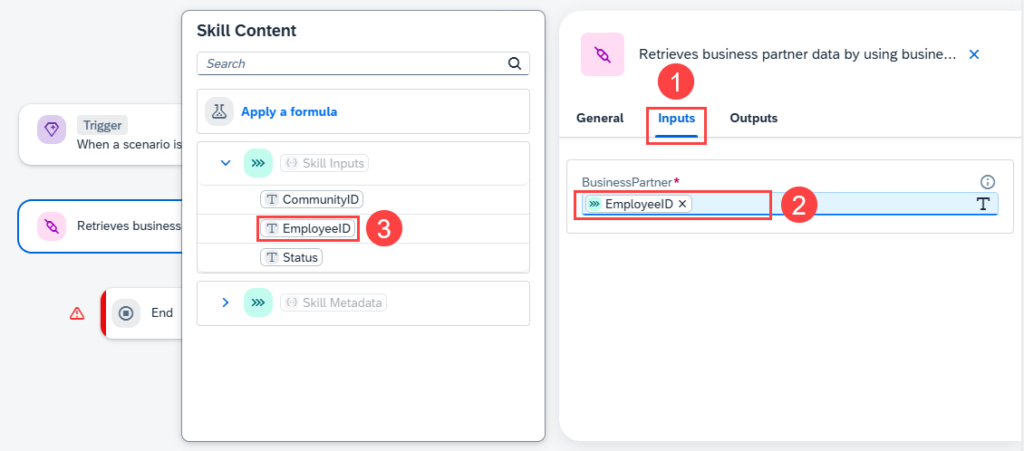
9. Choose EmployeeID.
10. Choose Outputs and expand the tree to see it
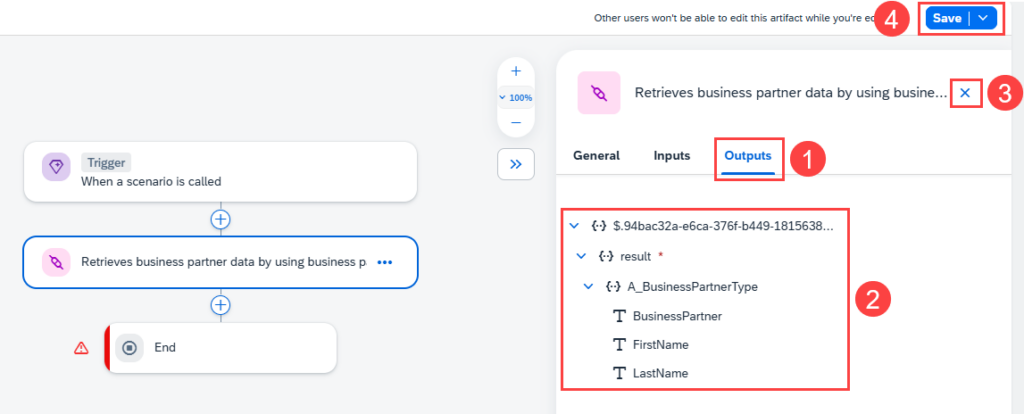
11. Close the pane and then choose Save.
Step 4
Add Second Action
1. Choose the + between the first action and End.
2. Choose Call Action.
3. Choose Browse All Actions.
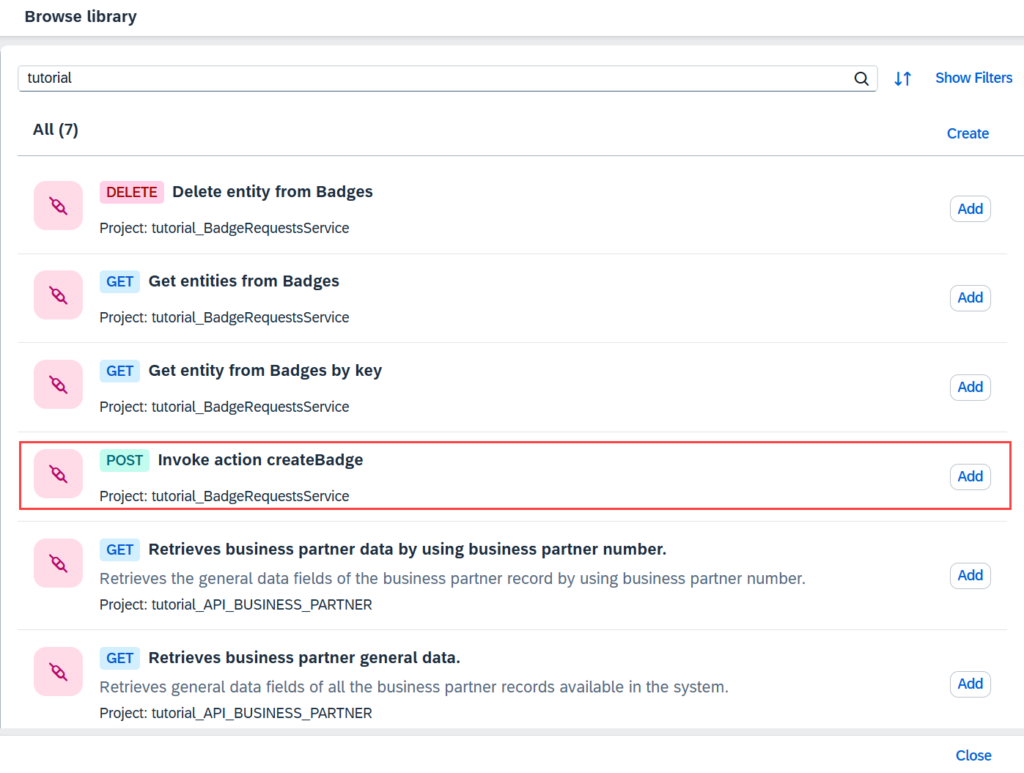
4. Select the action POST Invoke action createBadge, then choose Add beside it.
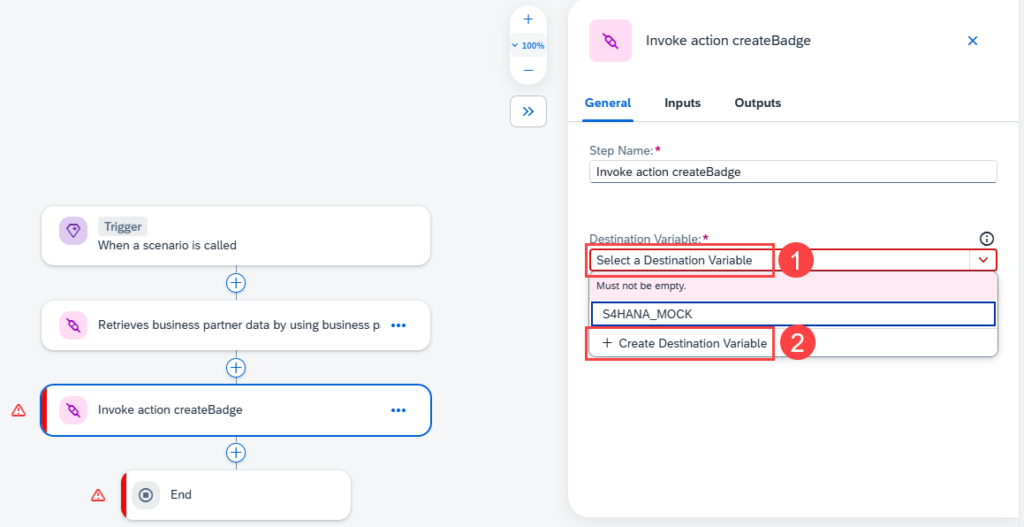
5. Choose Select a Destination, then choose + Create a Destination Variable.
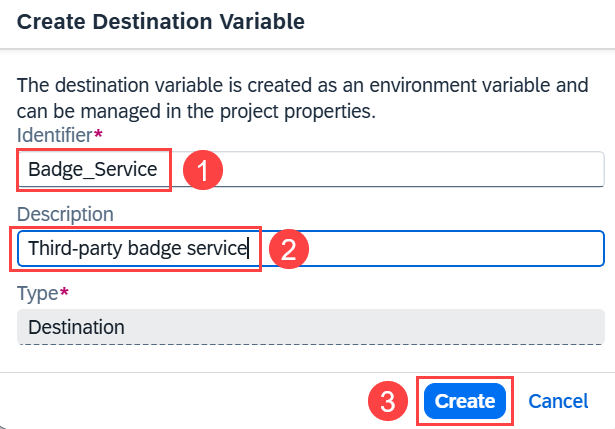
6. Enter Badge_Service and a description, then choose Create.
7. Select the Badge_Service destination variable.
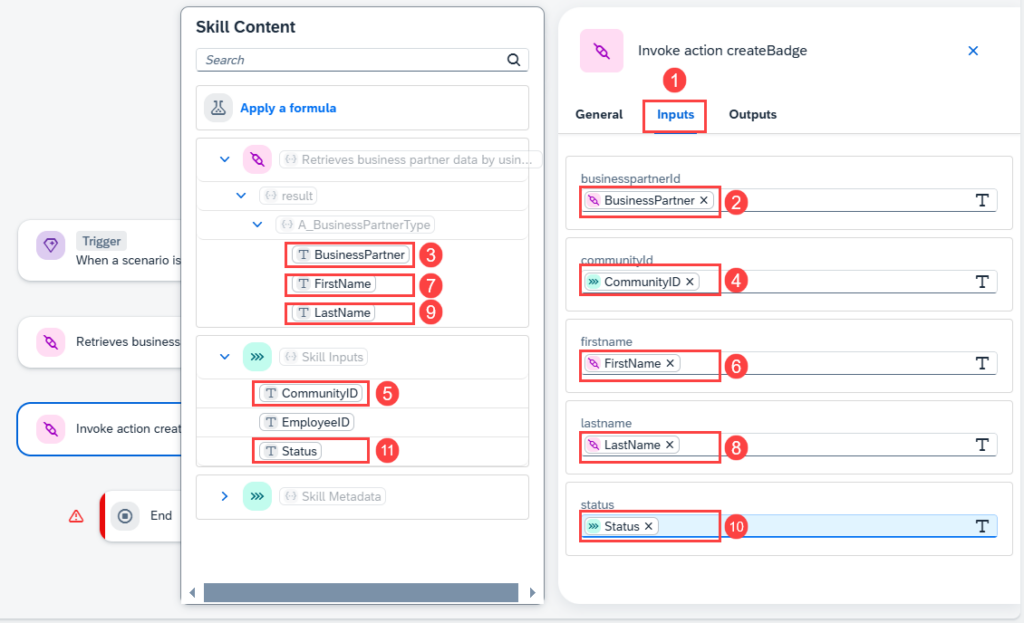
8. Choose Inputs, then choose the businesspartnerId field to open the Skill Content pane.
9. Expand the tree in the Skill Content pane and map the fields as shown.
10. Choose Outputs and then expand the tree to see the result.
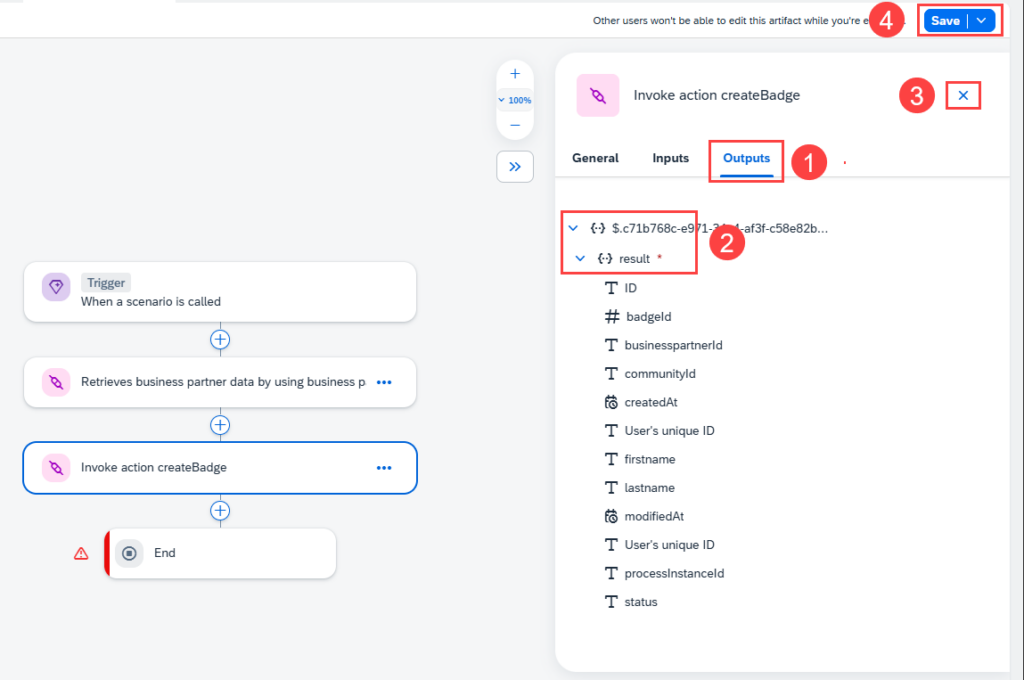
11. Close the pane and then choose Save.
Step 5
Define the Send Message
1. Choose the + between the second action and the End element.
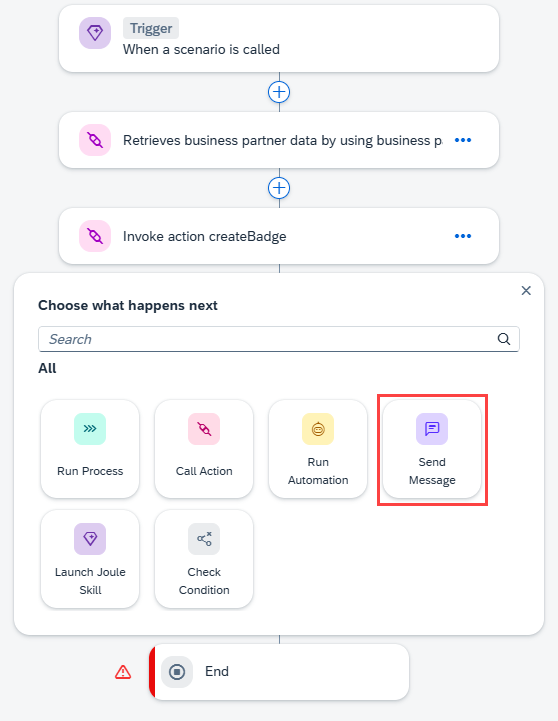
2. Choose Send Message.
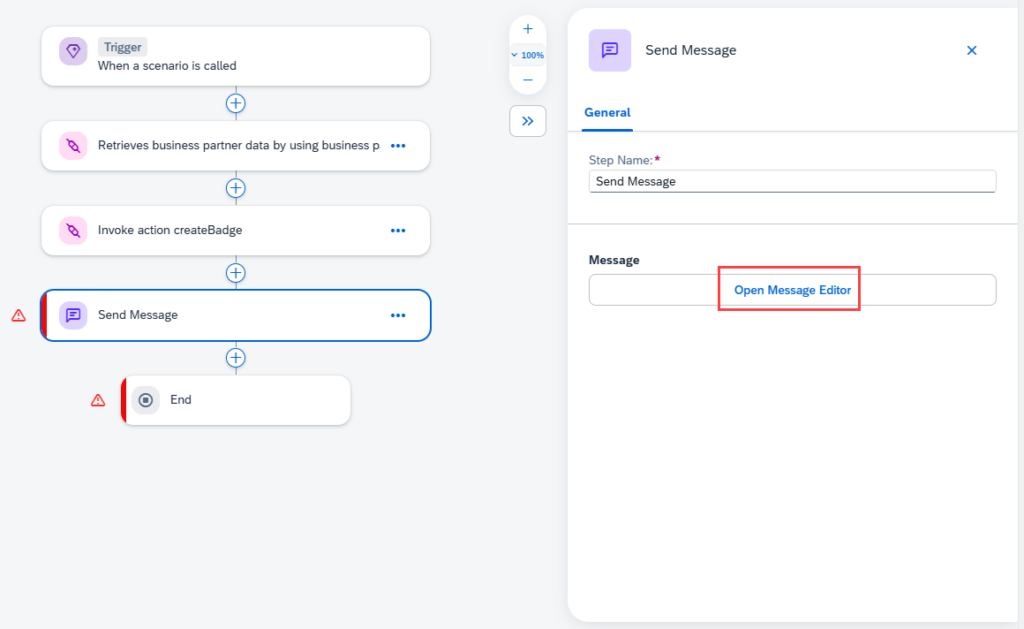
3. Choose Open Message Editor.
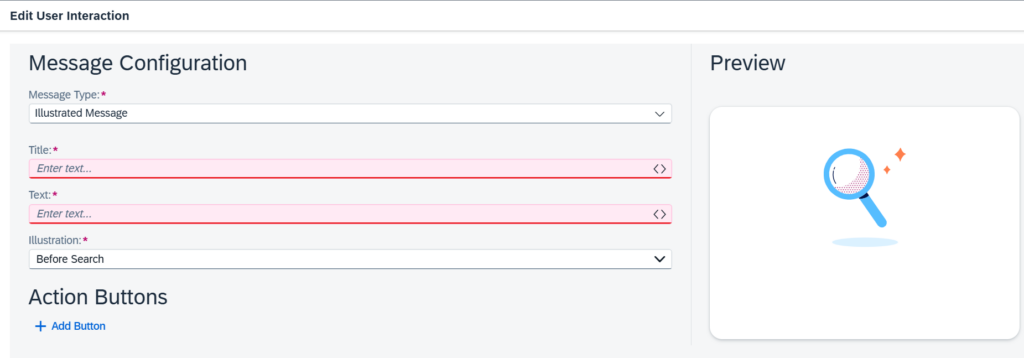
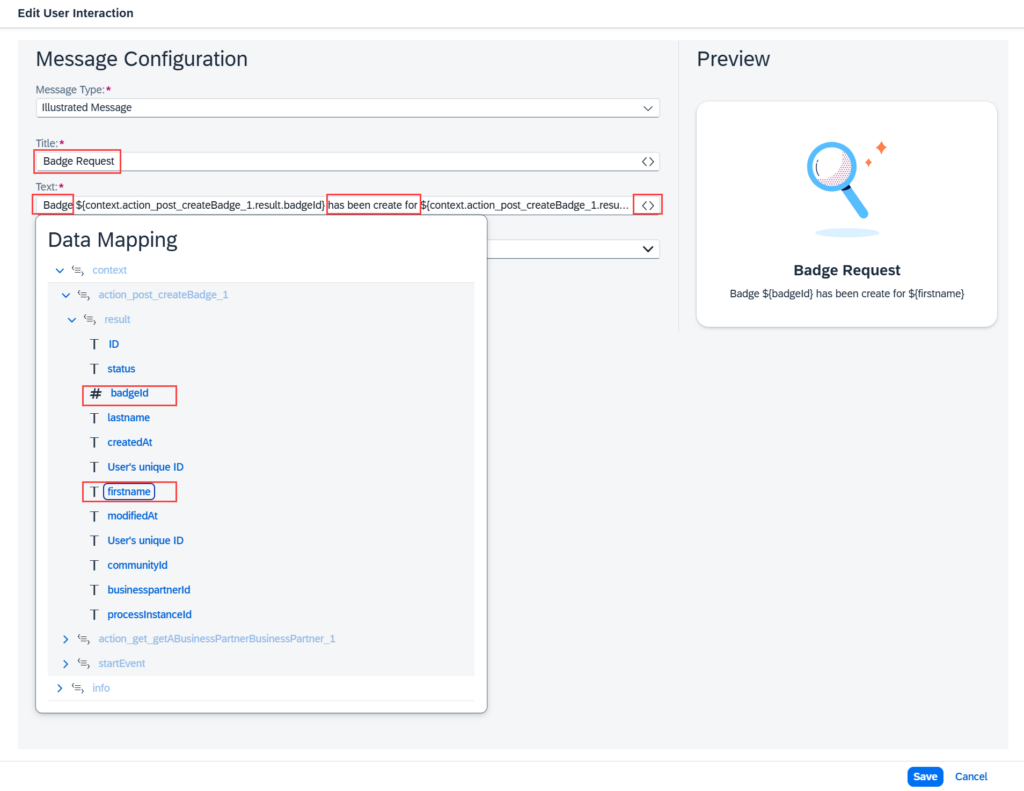
4. Enter Badge Request in the Title field.
5. In the Text field, enter Badge has been created for. Then use <> to open Data Mapping and add the badgeId and firstname parameters.
6. In the Illustration field, choose an appropriate illustration.
7. Choose Add Button
8. Enter Go to Badge System.
9. Enter https://dev-advocates-sap-build-full-66wu1vlc.launchpad.cfapps.us10.hana.ondemand.com/buildapps237846.buildapps237846/index.html
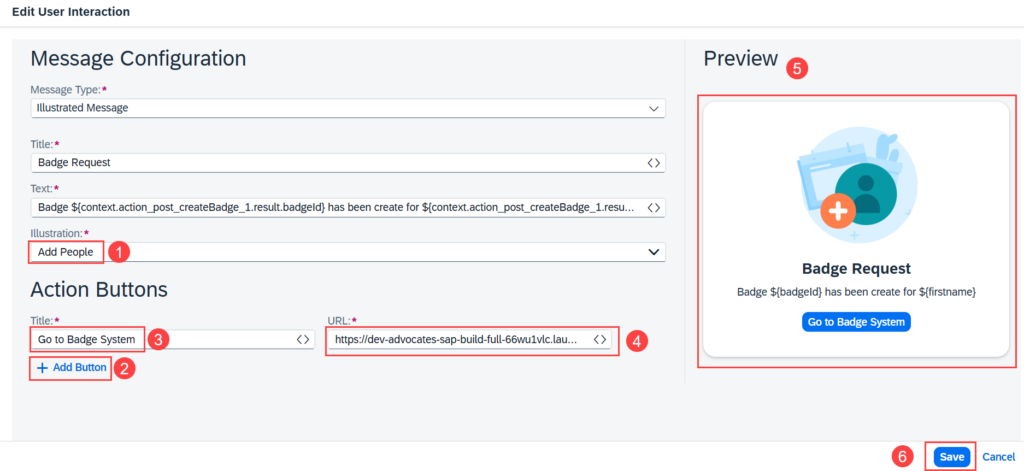
10. Check the preview and then choose Save.
11. Close the side pane and choose Save.
Step 6
End Configuration
1. Choose End.
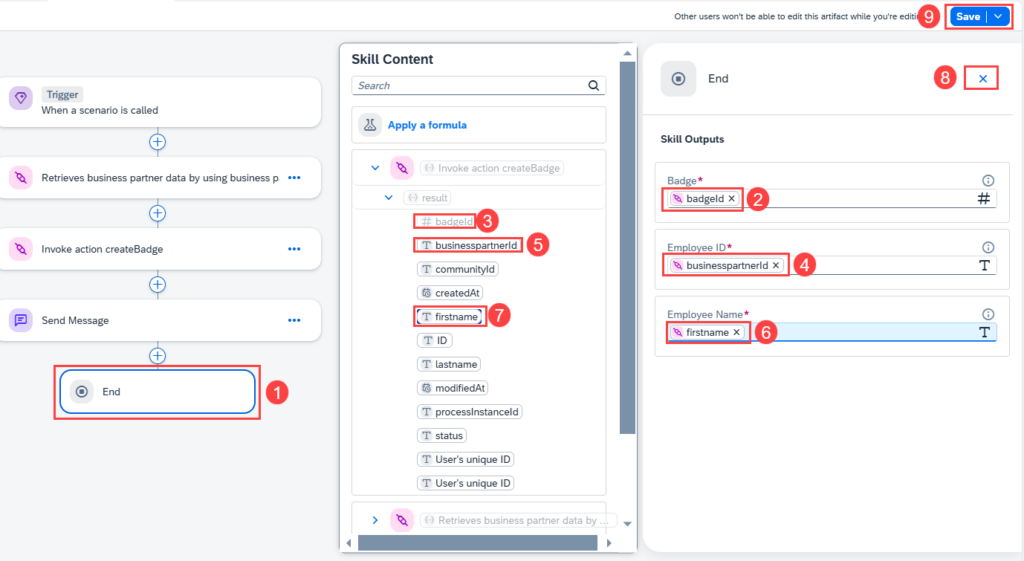
2. Map the fields as shown.
3. Close the side pane and choose Save.
Step 7
Release and Deploy
1. Choose Release.
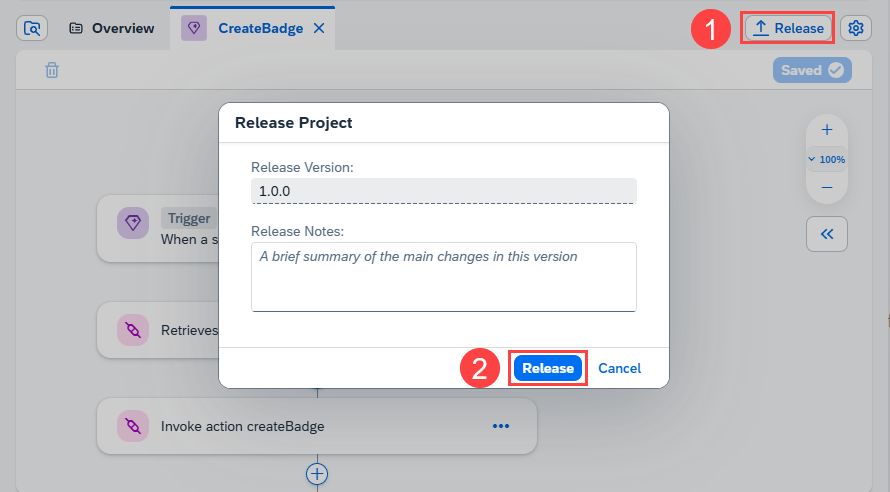
2. Choose Release.
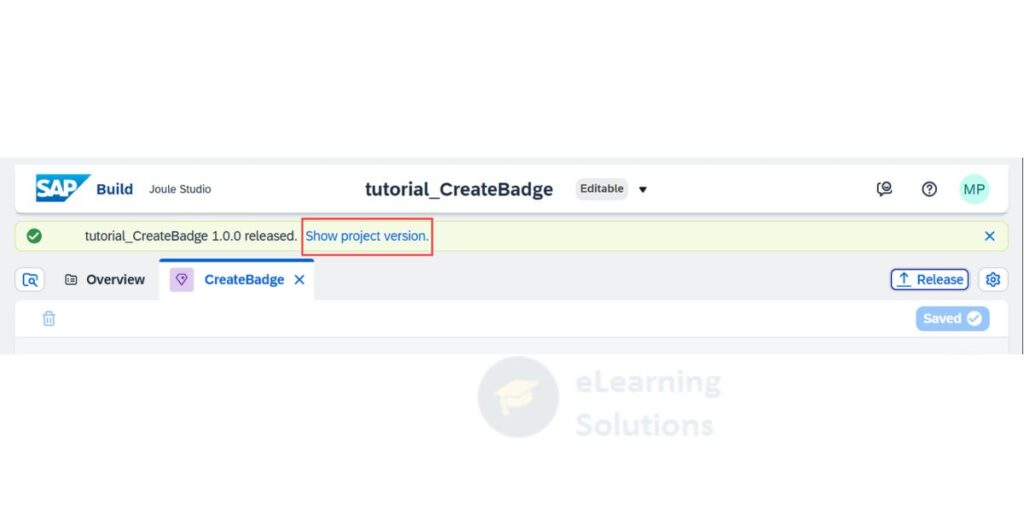
3. Choose Show Project Version to change to the released version.
4. Choose Deploy.
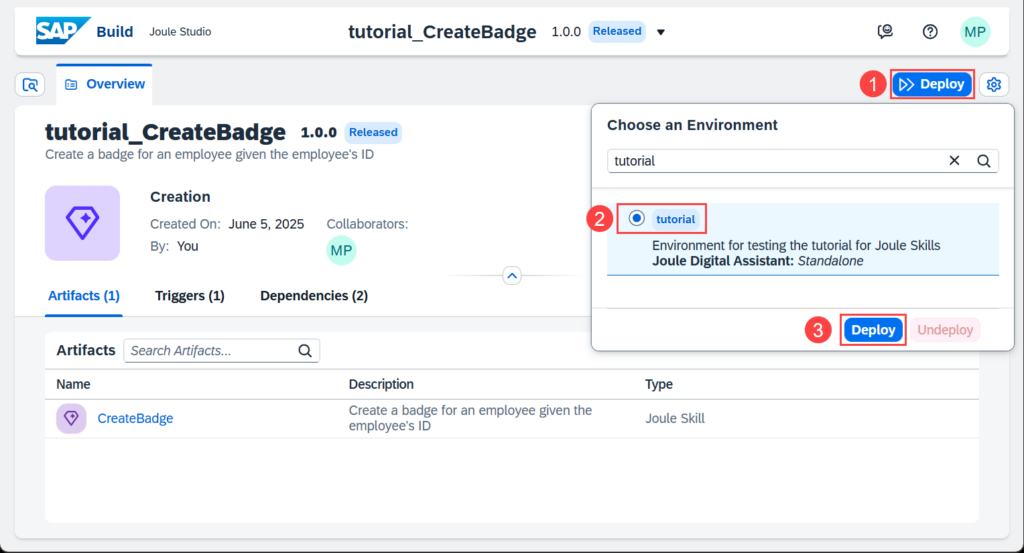
5. Select your environment and choose Deploy.
6. Select the respective destinations
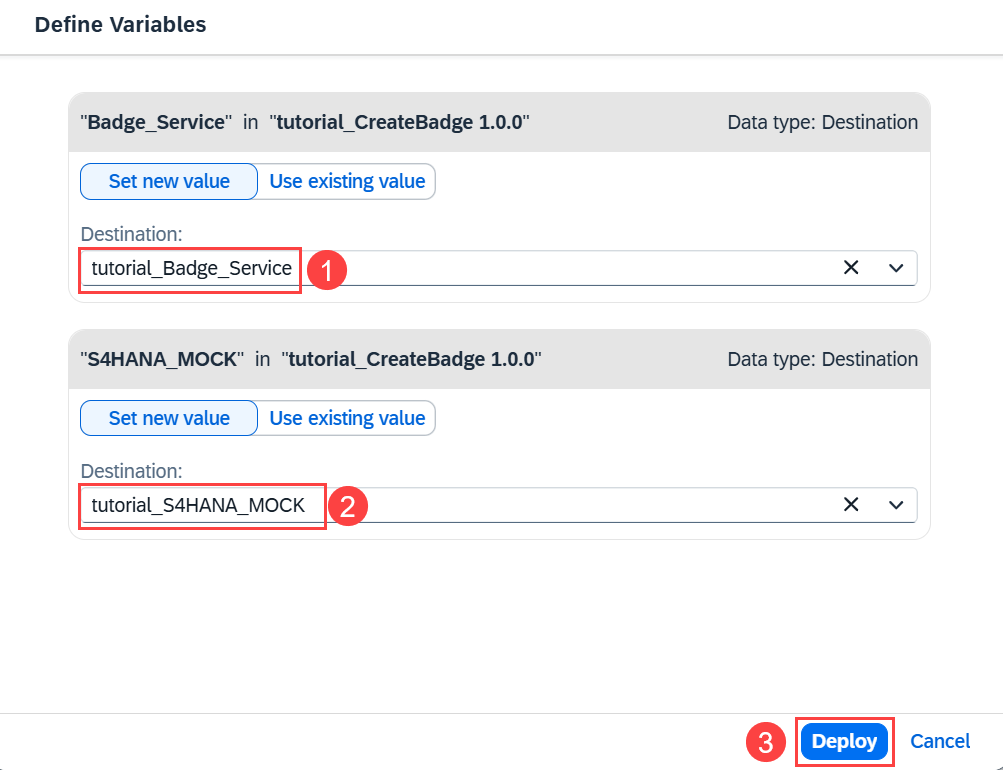
7. Choose Deploy.

Step 8
Test in Standalone Assistant
1. Go to the SAP Build Lobby.
2. Choose Control Tower -> Environments.
3. Choose your environment.
4. Choose Joule.
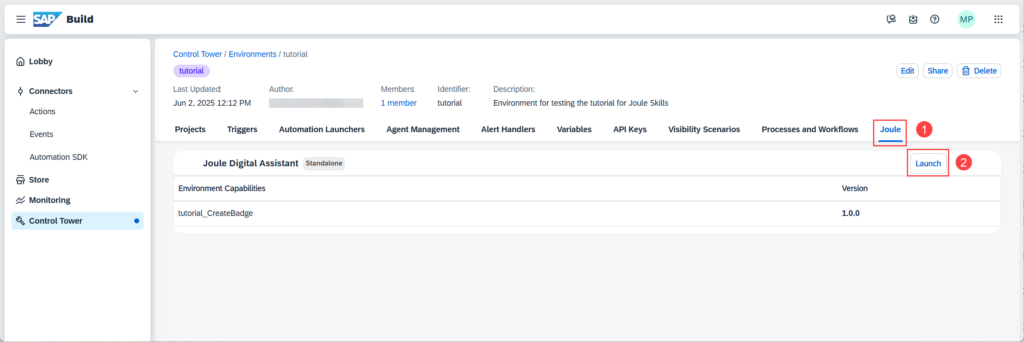
5. Choose Launch.
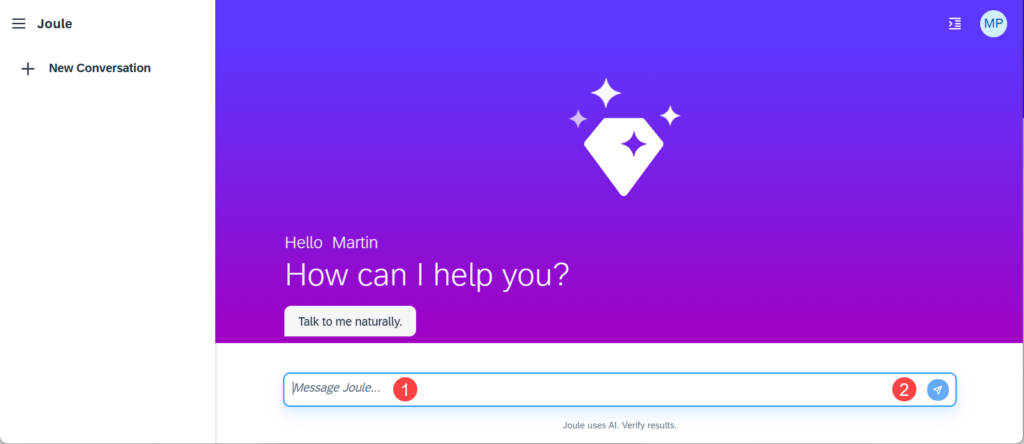
6. Enter Please create a badge for the employee with the ID 1003764. The badge status is NEW and his community ID is john.doe@bestrunsap.com
7. Choose Send.
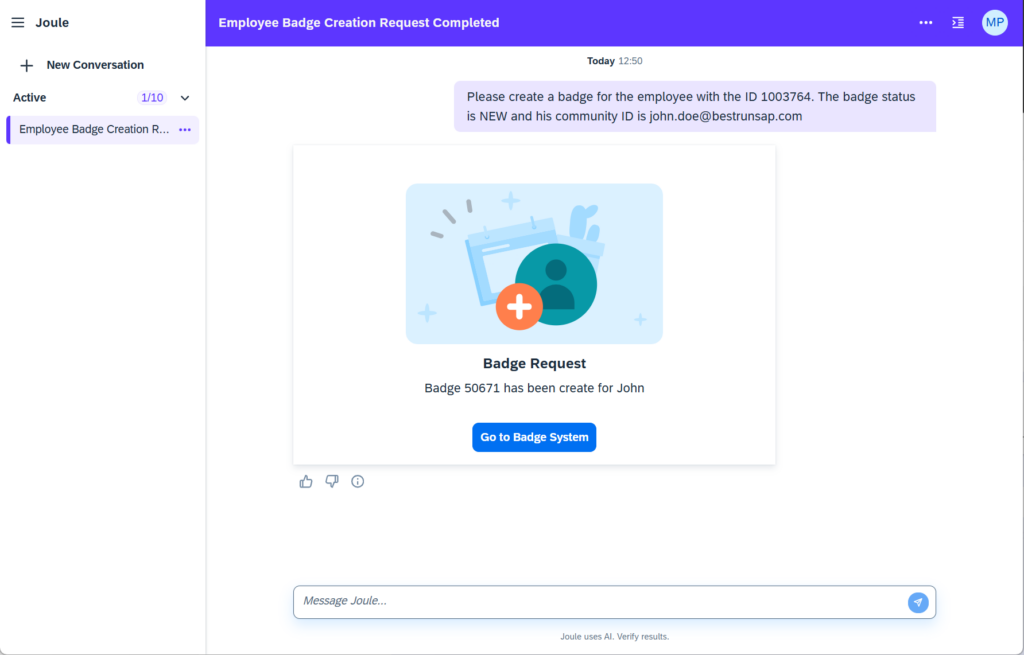
8. Choose the Go to Badge System button.
(The logon screen for the application will appear.)
9. Enter User Name: code, Password: me??Jam7, then choose Continue.
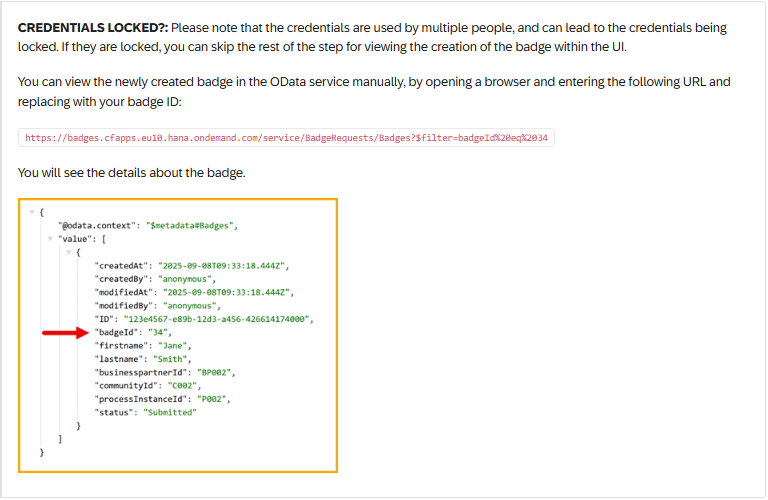
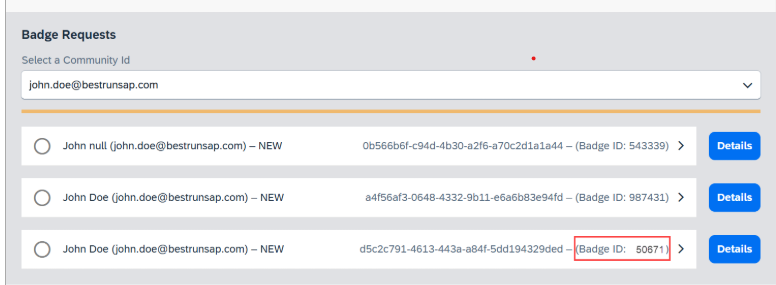
10. Find your Badge ID in the list of requests.
Step 9
Conclusion
Creating and deploying a Joule Skill in SAP Build is an effective way to extend SAP Joule with custom business capabilities. In this tutorial, you learned how to create a new Joule Skill, configure its input and output parameters, integrate multiple action projects, define a user-friendly response, deploy the project, and test it using the standalone Joule Assistant.
By mastering these steps, you can build AI-powered business workflows that automate repetitive tasks, improve productivity, and deliver a better user experience across SAP applications. As you continue exploring Joule Studio, consider adding more complex business logic, integrating additional SAP or third-party services, and creating skills tailored to your organization’s specific requirements.
Keep practicing with different scenarios, and you’ll gain the confidence to develop more advanced AI-powered solutions using SAP Build and SAP Business Technology Platform.
